Monday, January 4, 2016

Managing Camel routes with Kura web UI

This repost of my DZone article - Managing Camel Routes With Kura Web UI.

In my previous post about Camel and Kura integration I demonstrated how to easily deploy Camel routes into Kura using Rhiot. In this article I would like to elaborate a little bit on how to manage Camel routes from the level of the Kura web UI.

Loading XML routes using SCR property


RhiotKuraRouter comes with a RhiotKuraRouter#updated(Map) method. The primary purpose of this callback is to allow a router to be a SCR component configured using the Kura Web UI and EuroTech Everyware Cloud, however you can use this callback outside the web UI and Everyware Cloud context.

Whenever RhiotKuraRouter#updated(Map) callback is executed, RhiotKuraRouter tries to read camel.route.xml property value (RhiotKuraConstants.XML_ROUTE_PROPERTY key constant), to parse its value and load it as an XML Camel routes. For example if the camel.route.xml property will be set to the following value...

<routes xmlns="http://camel.apache.org/schema/spring">
    <route id="mqttLogger">
        <from uri="paho:topic?brokerUrl=tcp:brokerhost:1883"/>
        <to uri="log:messages"/>
    </route>
</routes>

...new route will be automatically started (or updated if route with ID equal to mqttLogger already exists).

All the above basically mean that if you register your Kura router as OSGi declarative service, you will be able to dynamically load and update XML routes using OSGi configuration admin service. 


Managing XML Camel routes using web UI


All RhiotKuraRouter instances implements Kura's ConfigurableComponent interface. It means that those can be configured using Kura web UI.

I highly recommend to use Rhiot Kura Camel quickstart as a template for creating Kura Camel routers. Our quickstart is configured as SCR component, so you can just deploy it to the Kura server and see your gateway route module deployed as a configurable service. To specify the route XML that should be loaded by a Camel context running in a deployed module, edit the camel.route.xml service property and click Apply button. As soon as Apply button is clicked, the route will be parsed and loaded.


Our Kura Camel quickstart can be also used from the EuroTech Everyware Cloud (EC).


Maintenance of the Kura routes at runtime


The ability to maintain Camel routes from web UI without restarting a Kura server is extremely important when it comes to the long term maintenance of your IoT gateway solution. It allows to modify a flow of the existing message routes or create new rules without affecting an uptime of your production environment.

Production-level grade IoT gateway (Kura) and powerful messaging framework (Camel) are an example of a perfect combination of two mature technologies which used together result in a solid, but flexible Internet Of Things solution.

Thursday, November 26, 2015

Creating Camel routes for Eclipse Kura

This is repost of my DZone article - Creating Camel routes for Eclipse Kura.

Eclipse Kura is the Open Source M2M Software Framework of choice for IoT Gateways, and it's well known for its ease of use and flexibility, and Apache Camel is a message routing engine providing out of the box dozens of connectors to different endpoints.
Eclipse Kura and Apache Camel, when joined together, give developers the possibility to abstract their application logic from both field protocols and data delivery, thus easing and speeding up the development process.
Rhiot Kura Camel quickstart can be used to create Camel router OSGi bundle project deployable into the Eclipse Kura gateway. Rhiot supports Kura gateway deployments as a first class citizen and this quickstart is intended to be used as a blueprint for Camel deployments for Kura. Under the hood Rhiot quickstart uses Camel Kura component to leverage an integration between Kura and Camel . 
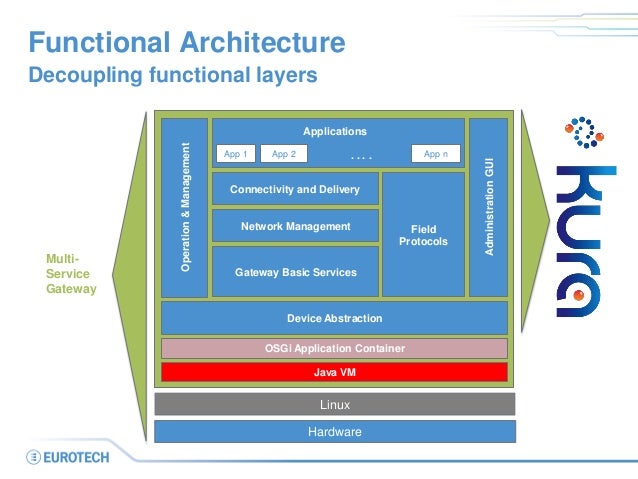
If you are wondering where Kura Camel project fits into the Kura architecture - our quickstart is deployed into the application layer of Kura, with a dedicated Camel context instance per application bundle.


Creating a Kura Camel project

In order to create the Kura Camel project from Rhiot quickstart execute the following commands:
git clone git@github.com:rhiot/quickstarts.git
cp -r quickstarts/kura-camel kura-camel
cd kura-camel
mvn install

Prerequisites

We presume that you have Eclipse Kura already installed on your target device. And that you know the IP address of that device. If you happen to deploy to a Raspbian-based device, and you would like to find the IP of that Raspberry Pi device connected to your local network, you can use the Rhiot device scanner, as demonstrated on the snippet below:
docker run --net=host -it rhiot/deploy-gateway scan
The command above will return an output similar to the one presented below:
Scanning local networks for devices...

======================================
Device type     IPv4 address
--------------------------------------
RaspberryPi2        /192.168.1.100
Keep in mind that /opt/eclipse/kura/kura/config.ini file on your target device should have OSGi boot delegation enabled for packages sun.*,com.sun.*. Your /opt/eclipse/kura/kura/config.ini should contain the following line then:
org.osgi.framework.bootdelegation=sun.*,com.sun.*
A boot delegation of sun packages is required to make Camel work smoothly in an Equinox.

Deployment

In order to deploy Camel application to a Kura server, you have to copy necessary Camel jars and a bundle containing your application. Your bundle can be deployed into the target device by executing an scp command. For example:
scp target/rhiot-kura-camel-1.0.0-SNAPSHOT.jar pi@192.168.1.100:/tmp
The command above will copy your bundle to the /tmp/rhiot-kura-camel-1.0.0-SNAPSHOT.jar location on a target device. Use similar scp command to deploy Camel jars required to run your project:
scp ~/.m2/repository/org/apache/camel/camel-core/2.16.0/camel-core-2.16.0.jar pi@192.168.1.100:/tmp
scp ~/.m2/repository/org/apache/camel/camel-core-osgi/2.16.0/camel-core-osgi-2.16.0.jar pi@192.168.1.100:/tmp
scp ~/.m2/repository/org/apache/camel/camel-kura/2.16.0/camel-kura-2.16.0.jar pi@192.168.1.100:/tmp
Now log into your target device Kura shell using telnet:
telnet localhost 5002
And install the bundles you previously scp-ed:
install file:///tmp/camel-core-2.16.0.jar
install file:///tmp/camel-core-osgi-2.16.0.jar
install file:///tmp/camel-kura-2.16.0.jar
install file:///tmp/rhiot-kura-camel-1.0.0-SNAPSHOT.jar
Finally start your application using the following command:
start 
Keep in mind that bundles you deployed using the recipe above are not installed permanently and will be reverted after the server restart. Please read Kura documentation for more details regarding permanent deployments.

What the quickstart is actually doing?

This quickstart triggers Camel timer event every second and sends it to the system logger using Camel Log component. This is fairy simple functionality, but enough to demonstrate the Camel Kura project is actually working and processing messages. 
The snippet below demonstrates the code of the route:
public class GatewayRouter extends KuraRouter {

    @Override    public void configure() throws Exception {
        from("timer://heartbeat").
                to("log:heartbeat");
    }

    ...

}

If you are curious how can you create more complicated routes connected to Kura internal services, you would be interested in incoming articles demonstrating those features.   

Monday, November 16, 2015

My "IoT for mere mortals" talk at Capgemini Tech event in Wrocław

If you happen to be in Wrocław this Wednesday, be sure to attend my "IoT for mere mortals" talk. The event takes place in Włodkowica 21 pub (which serves pretty decent beer by the way). I will start do the talking around ~18:00. If you wanna hear a gentle introduction to the Internet Of Things, my talk is for you.

After the presentation I plan to stay for some beers at the venue, so you're more than welcome to join me :) .

Many thanks for Capgemini Poland for inviting me again. I really enjoyed my last visit at Capgemini Tech event where I delivered "Containerize it!" talk.

See you!

Thursday, November 5, 2015

IoT AMQP backend in seconds (with Rhiot)

This is repost of my DZone article - Building an IoT AMQP Backend in Seconds With Rhiot.
The AMQP is becoming widely adopted as the protocol of choice the communication between an IoT gateway and a data center. If you would like to rapidly create the AMQP backend service that can be immediately ready for your gateways and devices, the Rhiot AMQP quickstart will be more than interesting for you.

The AMQP cloudlet quickstart can be used as a base for the fat-jar AMQP microservices (aka cloudlets). If you wanna create a simple backend application capable of exposing AMQP-endpoint and handling the AMQP-based communication, the AMQT cloudlet quickstart is the best way to start your development efforts.

Creating and running the AMQP cloudlet project

In order to create the AMQP cloudlet project execute the following commands:
git clone git@github.com:rhiot/quickstarts.git
cp -r quickstarts/cloudlets/amqp amqp
cd amqp
mvn install
To start the AMQP cloudlet execute the following command:
java -jar target/rhiot-cloudlets-amqp-1.0.0-SNAPSHOT.jar
That is really all you need to expose the AMQP message broker to the external devices and gateways.
You can also build and run it as a Docker image (we love Docker and highly recommend this approach):
TARGET_IMAGE=yourUsername/rhiot-cloudlets-amqp
mvn install docker:build docker:push -Ddocker.image.target=${TARGET_IMAGE}
docker run -it ${TARGET_IMAGE}

AMQP broker

By default AMQP cloudlet quickstart starts embedded ActiveMQ AMQP broker on 5672 port. If you would like to connect your cloudlet application to the external ActiveMQ broker (instead of starting the embedded one), run the cloudlet with the BROKER_URL environment variable or system property, for example:
java -DBROKER_URL=tcp://amqbroker.example.com:61616 -jar target/rhiot-cloudlets-amqp-1.0.0-SNAPSHOT.jar
...or...
docker run -e BROKER_URL=tcp://amqbroker.example.com:61616 -it yourUsername/rhiot-cloudlets-amqp

Sample chat application

The AMQP cloudlet quickstart is in fact a simple chat application. Clients can send the messages to the chat channel by subscribing to the broker and sending the messages to the chat AMQP queue.
$ amqp-client -h localhost -p 5672 --topic chat "Hello, this is the IoT device!"

The clients can subscribe to the chat updates by listening on the chat-updates AMQP topic - whenever the new message has been sent to the chat channel, the clients registered to the chat-updates will receive the updated chat history.
$ amqp-client -h localhost -p 5672 --subscribe --topic chat-updates
Hello, this is the IoT device!
I just wanted to say hello!
Hello, IoT device. Nice to meet you!

The quickstart also exposes the simple REST API that can be used to read the chat history using the HTTP GET request:
$ curl http://localhost:8180/chat
Hello, this is the IoT device!
I just wanted to say hello!
Hello, IoT device. Nice to meet you!

Architectural overview

When AMQP cloudlet is started with the embedded ActiveMQ broker, the architecture of the example is the following:
When you connect to the external ActiveMQ broker (using BROKER_URL option), the architecture of the example becomes more like the following diagram:

The quickstart code

You may be wondering how much code do you need in order to take the advantage of the presented AMQP functionality. Below is all code used by our quickstart to handle the AMQP connectivity: 


import io.rhiot.steroids.camel.CamelBootstrap;

import java.util.LinkedList;
import java.util.List;

import static io.rhiot.steroids.activemq.EmbeddedActiveMqBrokerBootInitializer.amqpJmsBridge;
import static org.apache.commons.lang3.StringUtils.join;

public class ChatCloudlet extends CamelBootstrap {

    static final List chat = new LinkedList<>();

    @Override
    public void configure() throws Exception {
        from(amqpJmsBridge("chat")).process(
                exchange -> chat.add(exchange.getIn().getBody(String.class))
        ).process(
                exchange -> exchange.getIn().setBody(join(chat, "\n"))
        ).to(amqpJmsBridge("topic:chat-updates"));
    }

}

And below is the code used to start the REST API mentioned before:

import io.rhiot.steroids.camel.Route;
import org.apache.camel.builder.RouteBuilder;

import static org.apache.commons.lang3.StringUtils.join;

@Route
public class ChatRestApiRoutes extends RouteBuilder {

    @Override
    public void configure() throws Exception {
        restConfiguration().component("netty4-http").host("0.0.0.0").port(8180);

        rest("/chat").get().route().process(
                exchange -> exchange.getIn().setBody(join(ChatCloudlet.chat, "\n"))
        );
    }

}

As you can see, Apache Camel is the first class citizen in the Rhiot world. In order to make Camel connectivity easier, Rhiot comes with the static DSL methods like  EmbeddedActiveMqBrokerBootInitializer.amqpJmsBridge which can be used to easily create the Camel endpoints associated with the broker used by the quickstart.

Thursday, October 29, 2015

Socialize! (join the Rhiot community)

We are getting more social :) . People interested in the Rhiot project can now use following channels to communicate with the other members of our community:


Some of us (for example myself) travel pretty much around various JVM/Tech/IoT events. I personally try to keep my twitter followers in the loop in the regards of my travel plans. And keep in mind that I always answer "yes" for coffee/beer/chat proposals :) . 

Have I mentioned that we love contributions? If you want to hack some cool IoT stuff and donate your code to the Rhiot, so the others can benefit from it, just issue pull request. You have some ideas but, not sure where to start? Just drop us a line - we will help you!


Monday, October 26, 2015

Going to EclipseCon? Come to my Camel+Kura talk!

Next Tuesday I will be at the EclipseCon EU 2015 where I will deliver Team up! Eclipse Kura and Apache Camel for IoT Gateways talk. That will be a joint talk I'm gonna give together with the EuroTech's Luca Dazi.

If you wanna catch up with me, feel free to ping me via twitter's @hekonsek.

About my talk:

Data gathering from the field and delivery to the Cloud is a common task in IoT solutions.
Developers find themselves struggling with field protocols on one side, and data delivery protocols on the other.
Eclipse Kura is the Open Source M2M Software Framework of choice for IoT Gateways, and it's well known for its ease of use and flexibility, and Apache Camel is a message routing engine providing out of the box dozens of connectors to different endpoints.
Eclipse Kura and Apache Camel, when joined together, give developers the possibility to abstract their application logic from both field protocols and data delivery, thus easing and speeding up the development process.
This talk will show how Kura and Camel can work together, showing several examples on how to gather data from the field using Kura APIs, and how to deliver messages to several data gathering endpoints using Camel APIs.

About EclipseCon:

EclipseCon Europe is the Eclipse Foundation’s primary European event designed to create opportunities for the European Eclipse community to learn, explore, share and collaborate on the latest ideas and information about Eclipse and its member companies.
EclipseCon is all about community. Contributors, adopters, extenders, service providers, consumers and business and research organizations gather to share their expertise and learn from each other. EclipseCon delivers networking opportunities that lead to synergies in the community, as well as opportunities to give and receive help on specific technical issues or to generate business opportunities

Thursday, October 22, 2015

Rhiot 0.1.2 is out

Rhiot 0.1.2 is finally out! Many thanks for Taariq Levack for the awesome job he did on the new GPSD Camel component and webcam Camel component.


What has exactly changed between Rhiot 0.1.1 and 0.1.2? Here is the complete list:


  • Added Camel webcam component
  • Deprecated BU353 component on the behalf of the GPSD component
  • Added GPS client coordinates type converter
  • Fixed: BU353 returns "FileNotFoundException: /dev/ttyUSB0 (Device or resource busy)" 
  • Rhiot now supports reading Spring Boot application.properties file
  • Renamed com.github.camellabs.iot.vertx.camel.GroovyCamelVerticle to io.rhiot.vertx.camel.GroovyCamelVerticle
  • Moved camel-kura component from com.github.camellabs to io.rhiot package
  • Device detection is performed in parallel
  • Added "scan" command to the deployer
  • Deployer now allows to specify customized fat jar
  • Deployer now downloads the same gateway version as deployer version
  • Deployer now detects devices from multiple interfaces
  • Deployer now scans OSX network interfaces
  • Device Cloudlet MongoDB connection now timeouts faster

Rhiot is a messaging platform for the Internet Of Things. We are focused on an adoption of the Red Hat JBoss middleware portfolio to provide solutions to common IoT-related challenges.

Monday, October 19, 2015

Rhiot about to support all GPSD-compatible GPS units

The BU353 Camel component for Rhiot has been well received in our community. I'm pretty happy to announce then that we plan to deprecated BU353 component in order to promote new, better and awesome GPSD Camel component. GPSD component is available (and highly recommended to use) starting from Rhiot 0.1.2.

Why is GPSD better than BU353?


  • GPSD component supports all GPSD-compatible GPS units, including BU353
  • GPSD component doesn't read from devices directly, but uses GPSD client and server for this prupose (so it is more reliable for concurrent access use cases) 
  • GPSD Time-Position-Velocity objects can be accessed to receive the detailed GPS information (like a current speed of the device), not only GPS location coordinates
  • you can use GPSD component to read the GPS data from the remote device running GPSD server  


BU353 to GPSD migration


GPSD component is really a drop in replacement for BU353 component. You can simply change your route from...

from("gps-bu353:current-position").
  convertBodyTo(String.class).
  to("file:///var/gps-coordinates");
...to...

from("gpsd:current-position").
  convertBodyTo(String.class).
  to("file:///var/gps-coordinates");
Spot the difference ;) .

Special thanks

Many thanks go to Taariq Levack, our brand new Rhiot committer, who authored this new component. Taariq, you rock :) .

Wednesday, September 30, 2015

Meet me at the ApacheCon Core EU 2015

This Friday I will be speaking at the ApacheCon EU 2015, in Budapest. The even takes place at the same venue as a year before i.e. at lovely Corinthia Hotel Budapest. I will be giving two IoT related talks:


I will be in Budapest for Thursday and Friday. If you are at the Budapest at this time, feel free to drop me a line!

About ApacheCon Core:
Core will bring together the open source community to learn about and collaborate on the technologies and projects driving the future of open source, web technologies and cloud computing. Apache projects have and continue to be hugely influential in the innovation and development of software development across a plethora of categories from content, databases and servers, to big data, cloud, mobile and virtual machine. The developers, programmers, committers and users driving this innovation and utilizing these tools will meet in Budapest, October 1 & 2, for collaboration, education and community building.

Monday, September 28, 2015

Rhiot quickstarts - getting into the IoT really fast!

The goal of the Rhiot project is to allow the developers to create the Internet Of Things projects as easily as possible. We want to make the complex IoT projects simpler and bring the fun to the IoT world, while preserving all the benefits the developers can gain from the rich Red Hat JBoss Middleware portfolio
Keeping Rhiot philosophy in mind, we decided to start releasing the quickstarts - the set of the base projects that can be used as a building blocks for the IoT solution. Rhiot quickstarts can be copied and used as the template for your IoT solution.
The programming model we have chosen for Rhiot quickstarts revolves around Camel and Vert.x. Camel routes are our primary choice for the expression of the endpoint connectivity and message routing. So starting embedded MQTT ActiveMQ broker and connecting to it might be as simple as using the following Groovy snippet:
class MyMqttApp extends CamelBootstrap {

    void configure() {
        from(mqtt('topic')).log('Received ${body}')
    }

}
Vert.x verticles and event bus are also the first class citizen in all the Rhiot applications. So Rhiot can help you with detecting Vert.x verticles or make it as easy to connect to the event bus as:
class MyMqttApp extends CamelGroovyVerticle {

    void configure() {
        eventBus('temperature').to(mqtt('temperature'))
    }

}
Looks interesting? More details about Rhiot API and quickstarts soon to come!

Tuesday, September 22, 2015

IoT server platform emerging at Eclipse

Recently at the Eclipse IoT Working group mailing lists one of our members raised the proposal to collaborate on the server-side platform specification.

Why this proposal is so important? Because it may result in the creation of the core engine for the IoT backend services that might become a kind of standard, as there are several companies interested in participating in the project.

I'm definitely interested in getting involved into that initiative. Tomorrow I will be presenting the Rhiot project to the Eclipse IoT Working Group, so the other members can see how Rhiot and that emerging platform could overlap.

I highly recommend to track the minutes published on the Eclipse IoT Working Group mailing lists. The emerging Eclipse platform can be a big thing!

BTW Wondering who is the part of the Eclipse IoT Working Group? EuroTech, IBM, Red Hat, Cisco, Bosch, Sierra Wireless, Canonical, Huawei, Verisign, to mention some of them.


Monday, September 14, 2015

Rhiot 0.1.1 is out

On the behalf of Rhiot team, I'm happy to announce that Rhiot 0.1.1 has been released. It's been a while since efforts related to rebranding the project from Camel Labs to Rhiot have been holding our release train.

What has changed in the latest Rhiot?


Thursday, July 30, 2015

Let's start the rhiot!

As many of you probably already know, in the recent months I've been hooked on the Internet Of Thing in general, and creating the rocking Internet Of Things messaging platform in particular. My R&D activities have been revolving around the adoption of the awesome Red Hat JBoss middleware portfolio to the IoT needs. Me, and the other folks interested in the adoption of the projects like Apache Camel or ActiveMQ to the IoT challanges, joined our forces to create the Camel IoT Labs project.

As the Camel IoT Labs project scope is really wider than the scope of the Camel itself, we decided to give up the old project name. Instead we would like to come up with something that would reflect the fact that we are working on the project with the bigger IoT messaging platform picture in mind.

We decided to go with renaming the project to rhiot (pronounced like riot). Our new name hides the Red Hat and IoT in it - which is fine, because we want to stress that our IoT project relies on the rock solid Red Hat software portfolio as its foundation. Starting from today we will be gradually migrating our Camel Labs to new Rhiot name. That will include moving our GitHub project to the new rhiot organization and changing our Maven coordinates from com.github.camellabs to io.rhiot.

I'm also thrilled to say that Red Hat decided to sponsor some R&D activities around the new Rhiot project. So stay tuned and expect amazing IoT stuff coming from the Rhiot team. Also keep in mind that we have really open policy regarding accepting new contributors for our project - if you want to help us to create the IoT messaging platform, you know where to find me :) .

Wednesday, July 29, 2015

Where am I? Collecting GPS data with Apache Camel

This is the re-post of my article Where Am I? Collecting GPS Data With Apache Camel originally posted at the DZone.

One of the most popular requirement for the field devices used in the IoT systems is to provide the current GPS location of that device and send this information to the data center. In hereby article I will tell you how Apache Camel can turn full-stack Linux microcomputer (like Raspberry Pi) into the device collecting the GPS coordinates.

Which GPS unit should I choose?

There is a myriad of the GPS receivers available in the market. BU353 is one of the most popular and the cheapest GPS units. It can be connected to the computer device via the USB port. If you are looking for good and cheap GPS receiver for your IoT solution, you should definitely consider purchasing this unit.

The picture below presents the BU353 connected to the Raspberry Pi device via the USB port.
You can optionally equip your Pi into the external mobile battery, like GOODRAM Power Bank P661. Equipped with the external power supply you can take your mobile GPS system to the car or into the outdoors. Battery significantly simplifies testing "in the field" part of your solution.


How can Camel help me?

Camel GPS BU353 component can be used to read the current GPS information from that device. With Camel GPS BU353 you can just connect the receiver to your computer's USB port and read the GPS data - the component will make sure that GPS daemon is up, running and switched to the NMEA mode. The component also takes care of parsing the NMEA data read from the serial port, so you can enjoy the GPS data wrapped into the com.github.camellabs.iot.component.gps.bu353.ClientGpsCoordinates POJO objects (which in turn are forwarded to your Camel routes).

Show me the code

In order to take advantage of the Camel GPS BU353 you have to add the following dependency to your Maven project:
    <dependency>
      <groupId>com.github.camel-labs</groupId>
      <artifactId>camel-gps-bu353</artifactId>
      <version>0.1.1</version>
    </dependency>
BU353 component supports only consumer endpoints - it makes sense as GPS component is used to read, not write, GPS data. The BU353 consumer is the polling one, i.e. it periodically asks the GPS device for the current coordinates. The Camel endpoint URI format for the BU353 consumer is as follows:
    gps-bu353:label
Where label can be replaced with any text label:
    from("gps-bu353:current-position").
      to("file:///var/gps-coordinates");
The Camel route presented above reads the current GPS coordinates every 5 seconds and saves these into the /var/gps-coordinates directory. Each GPS coordinates pair is saved into the dedicated file. The complete runnable example of the route above is presented in the code snippet below. I use Camel Spring Boot support to start the Camel context and load the route definition:
@SpringBootApplication
public class GpsReader extends FatJarRouter {

  public void configure() throws Exception {
    from("gps-bu353:current-position").
      to("file:///var/gps-coordinates");
  }

}
BU353 consumer receives the com.github.camellabs.iot.component.gps.bu353.ClientGpsCoordinates instances. ClientGpsCoordinates class is a convenient POJO wrapper around the GPS data:
  ConsumerTemplate consumerTemplate = camelContext.createConsumerTemplate();
  ClientGpsCoordinates currentPosition = 
    consumerTemplate.receiveBody("gps-bu353:current-position", ClientGpsCoordinates.class);

  String deviceId = currentPosition.clientId();
  Date taken = currentPosition.timestamp();
  double latitude = currentPosition.lat();
  double longitude = currentPosition.lng();
ClientGpsCoordinates class name is prefixed with the Client keyword to indicate that these coordinates have been created on the device, not on the server side of the IoT solution.

Process manager

Process manager is used by the BU353 component to execute Linux commands responsible for starting GPSD daemon and configuring the GPS receiver to provide GPS coordinates in the NMEA mode. If for some reason you would like to change the default implementation of the process manager used by Camel (i.e. com.github.camellabs.iot.utils.process.DefaultProcessManager), you can set it on the component level:
    GpsBu353Component bu353 = new GpsBu353Component();
    bu353.setProcessManager(new CustomProcessManager());
    camelContext.addComponent("gps-bu353", bu353);
If the custom process manager is not set on the component, Camel will try to find the manager instance in the registry. So for example for the Spring application, you can just configure the manager as the bean:
    @Bean
    ProcessManager myProcessManager() {
        new CustomProcessManager();
    }
The custom process manager may be useful if for some reasons your Linux distribution requires executing some unusual commands in order to make the GPSD up and running.

What's next?

Do geographical capabilities of the Camel seem compelling to you? Then you should also Camel Geocoder component which can be used to easily convert GPS coordinates collected via Camel into the human readable street address. Also stay tuned for the geofencing features coming soon to the Camel IoT Labs project.

Thursday, July 23, 2015

Measuring the throughput of the IoT gateways

The key part of the process of tailoring the perfect IoT solution is choosing the proper hardware for the gateway device. In general the more expensive gateway hardware is, the more messages per second you can process. However the more expensive the gateway device is, the less affordable your IoT solution becomes for the end client. That is the main reason why would you like to have a proper tool for measuring the given IoT messages flow scenario in the unified way, on multiple devices.


Camel Labs Performance Testing Framework

Camel IoT Labs comes with the Performance Testing Framework that can be used to define the hardware profiles and test scenarios. Performance framework takes care of detecting the devices connected to your local network, deploying the test application into these, executing the actual tests and generating the results as the human-readable chart. For example the sample output for the MQTT QOS testing could generate the following diagram:


When to use Performance Testing Framework

Performance Testing Framework excels when you would like to answer the following question - how the different field hardware setups perform against the given task. And to answer that question just connect your devices to the local network, execute the performance testing application and compare the generated diagrams.

Here is the 30 seconds video guide demonstrating how easy it is to perform the test:


Hardware profiles

This section covers the hardware profiles for the performance tests. Profiles are used to describe the particular hardware configuration that can be used as a target device for the performance benchmark. Every performance test definition can be executed on the particular hardware profiles.

The example of the hardware profile can be Raspberry PI 2 B+ (aka RPI2).  The RPI2 hardware profile is just the Raspberry Pi 2 B+ model equipped with the network connector (WiFi adapter or the ethernet cable). Currently we assume that the device is running Raspbian operating system (version 2015-05-05).


The other profile we defined for the Camel Labs is the Raspberry is the PI 2 B+ with BU353 (aka RPI2_BU353) The RPI2_BU353 hardware profile is the same as RPI2 profile, but additionally equipped with the BU353 GPS receiver plugged into the USB port.


Running the performance tester 

The easiest way to run the performance benchmark is to connect the target device (for example Rapsberry Pi) into your local network (for example via the WiFi or the Ethernet cable) and start the tester as a Docker container, using the following command:

docker run -v=/tmp/gateway-performance:/tmp/gateway-performance --net=host camellabs/performance-of RPI2

 Keep in mind that RPI2 can be replaced with the other supported hardware profile (like RPI2_BU353). The performance tester detects the tests that can be executed for the given hardware profile, deploys the gateway software to the target device, executes the tests and collects the results. When the execution of the benchmark ends, the result diagrams will be located in the /tmp/gateway-performance directory (or any other directory you specified when executing the command above). The sample diagram may look as follows:


Keep in mind that currently we assume that your Raspberry Pi has default Raspbian SSH account available (username: pi / password: raspberry).

Future of the framework

I plan to develop the gateway Performance Testing Framework to make it the tool for the sizing of the IoT gateways. In particular I plan do add more benchmarks and supported hardware profiles. The performance framework is also a great tool to perform the fully automated end-to-end integration tests on the real hardware - I would definitely like to see the PTF as the tool for running Jenkins-based integration tests executed on the real devices.

Over-the-air runtime updates of the IoT gateways

This is the repost of my article originally published at the DZone - Over-the-Air Runtime Updates of the IoT Gateways.

The Internet Of Things gateways are usually installed on the devices designed to run for a longer periods of time without the downtime. The is common requirement for the gateway to keep the uninterrupted processing of the messages collected from the field, even when configuration changes have to be applied to the device. While in the Java world the OSGi technology has been commonly identified with the hot redeploy features, I would like to tell you more about the possibilities that Apache Camel running outside the OSGi environment can bring into this topic.


Adding new components at runtime


Apache Camel relies on the components to provide the connectors which can be used to consume messages from the various endpoints (as well as send the messages to the endpoints). For example the gateway based on the Apache Camel could use Paho MQTT component to consume the control commands from the data center and at the same time use the Netty component to communicate with the backed REST services.


Now imagine that at some point we decided to add Salesforce component to our Gateway, so the copy of the message we sent to the backend REST service can be also sent directly to our Salesforce account.


Can we somehow dynamically add the jar containing the Salesforce component to all our production gateway devices deployed into the field? Since the gateways are constantly processing the messages from the sensors, we would like to avoid any restarts of the devices.


Dynamic updates using Camel Grape endpoints


Camel 2.16 comes with new Groovy-based Grape component. Grape is the part of the Groovy language - it is the library that can download the other libraries and add them to the classpath of the current JVM. Grape component downloads jar libraries from the file repositories (including Maven repos) and add these jars dynamically to the application classpath. As soon as the library is downloaded, the Camel can take advantage of new components and data formats provided by these jar files. For example the following Camel route will download and install Camel Saleforce component:
from("direct:start").
  to("grape:org.apache.camel/camel-salesforce/2.15.2");

After the Saleforce jar has been loaded, you can use it in the Camel routes. All that without the restart of the gateway application:

ProducerTemplate template = camelContext.createProducerTemplate();
template.sendBody("direct:dynamicEndpoint", "salesforce:createSObject");
...
from("direct:dynamicEndpoint").
  recipientList().body();


Over-the-air updates


How can we dynamically update many gateways at once using over-the-air technology? As gateways usually run in the environment with the unreliable network connection, I recommend that gateway should listen to the MQTT messages sent from the data center. MQTT client is capable of handling the unstable network connectivity. MQTT client installed on the gateway should connect to the given "update" topic (let's refer to it as over-the-air topic). Whenever we would like to load the component dynamically, we can simply use MQTT over-the-air topic and send the Maven coordinates of the artifact we want to be downloaded to the devices. We can use Camel Paho component for that purpose:
// This code is executed on the data center side.
ProducerTemplate template = camelContext.createProducerTemplate();
// Tell all our devices connected to the over-the-air MQTT topic 
// to download Camel Salesforce connector.
template.sendBody("paho:over-the-air", "org.apache.camel/camel-salesforce/2.15.2");

The following Camel route deployed on the gateway field devices can be used to receive the update requests from the MQTT broker and send them to the Grape component:
from("paho:over-the-air").
  to("grape:over-the-air");

That's all what you need to fetch and load the new library into all of your gateway devices.


Dealing with the download failures


You may be wondering what happens when the Grape component can't download the requested artifact, for example because of the network problems, so common the field environments. The is the moment when Camel and its Camel error handler redelivery policy jumps in. You can easily tell Camel what retry strategy should be used to eventually fetch and load the required dependency. All you have to do is to use a bit of the Camel DSL:
errorHandler(defaultErrorHandler().maximumRedeliveries(10).useExponentialBackOff());

Using this approach you can be sure that Camel will be keep trying to download the requested library. Usually after certain number of attempts to download the artifact, you would like to send back the error MQTT message back to the data center, so your operations team can be notified about the upgrade problems at the given device.


Loading patches on the gateway restart


The another natural question is if the patches loaded by the Grape component will be persisted after the gateway restart. Yes, Camel Grape component keeps track of the patches it loaded (by default the list of the deployed patches is stored in the device file system using plain text file). If you would like to tell Camel to load the installed patches, add the GrapeEndpoint.loadPatches method call into your route definition:
import static org.apache.camel.component.grape.GrapeEndpoint.loadPatches;
...
camelContext.addRoutes(new RouteBuilder() {
  @Override
  public void configure() throws Exception {
    loadPatches(camelContext);
  }
});


Listing patches installed on the gateway


You might be also interested in listing the patches installed on the particular gateway device. The following route demonstrates how to connect embedded HTTP server based on the Netty with the Grape component...

import static org.apache.camel.component.grape.GrapeEndpoint.loadPatches;
...
camelContext.addRoutes(new RouteBuilder() {
  @Override
  public void configure() throws Exception {
    loadPatches(camelContext);

    from("netty4-http:http://0.0.0.0:80/patches").
      setHeader(GrapeConstants.GRAPE_COMMAND, GrapeCommand.listPatches).
      to("grape:listPatches");
  }
});


...so you can open the following URL in the web browser and see the list of the installed artifacts:

$ curl http://your.gateway.com/patches
org.apache.camel/camel-salesforce/2.15.2
org.apache.camel/camel-ftp/2.15.2


Summary


As you can see, Camel in the conjunction with Groovy class loading capabilities provides hot updates features extremely useful for the IoT systems. Camel ability to provide runtime updates over-the-air is an interesting alternative for the OSGi deployments. With the Camel Grape component you can take advantage of the dynamic class loading while keeping all the benefits of the flat classpath.